


Creating your first level in Fortnite with UEFN
Join us as we explore the Fab marketplace, import a custom mesh, and prepare it in the UEFN
The massive Fortnite phenomenon has opened the doors to a new dimension: the creation and publication of playable experiences by anyone.
The game has left an indelible mark on the gaming industry, and its most recent milestone, the Fortnite Creative 2.0, has spurred the creativity of users to create their own playable experiences.
In fact, this creative revolution has led to almost half of the time spent playing the game being spent on user-made experiences that take full advantage of the Fortnite Creative 2.0 tool.
As lovers of virtual worlds, our goal is to bring your ideas to life and support you through the first steps of creating your first Fortnite level in a satisfying way. From newbies to aspiring designers, this article will introduce you to creating custom experiences with Unreal Editor for Fortnite.
Ready to explore the limitless creativity Fortnite has to offer? Here we go!
Installing Unreal Editor for Fortnite
Let's start at the beginning: understand what the software we are going to use does.
Introducing Unreal Editor For Fortnite, from now on we'll call it UEFN for short. This is the free tool provided by this game to create custom experiences, edit levels and modify the environment and gameplay mechanics.
It opens the door to a multitude of modelling tools and materials, mesh import, textures and even animation. The list of possibilities is very long, but in this article we will focus on the basics. For the time being.
So, we will need the following software installed on our PC to get started:
- UEFN (Surprise!)
Note that you will need an Epic Games account to get started. And also the Fortnite game, even if it's obvious. And remember that in order to publish a custom map in Fortnite there are some requirements, related to your social media followers and time using the editor.
First steps
First of all, let's create a new project. The Project Browser tab will open automatically, and we will click on Island Templates courtesy of Fortnite, which we will use to create our first level.
To have all the settings ready, as well as to know the shortcuts to move around the scene and work with assets from the Fortnite Library, check our Creating your first Fortnite scene with library assets tutorial where we explain it in detail.
How to import assets
In this tutorial, we will focus on the options we have for exporting external assets to the Fortnite Library. We have two:
- Fab. It will open a tab in which you will see the FAB library, a huge marketplace where you can download a multitude of 3D assets, both free and paid. You can even upload your own creations and share them with the maker community!
- Import Button. This is where we can upload our own 3D models.
Fab Marketplace
Click on the Fab button et voilà, this gigantic library will open in front of us. We will have access to a multitude of options, such as complete asset packs or more specific models.
Within a Pack Content we can see its characteristics and visualize the assets that compose it, just like in Sketchfab. Paid and free packs are both available, with different licenses depending on the intended use.
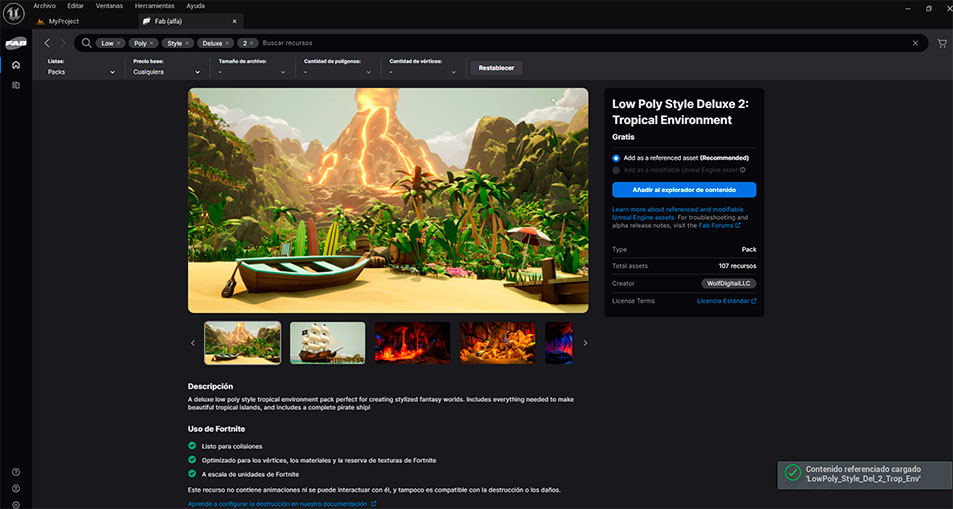
We will download this sexy pack from WolfDigitalLLC, simply click on Add to Content Browser and the content will start downloading. To start using this content, open the bottom left tab Content Browser>Referenced Content>Pack Name.

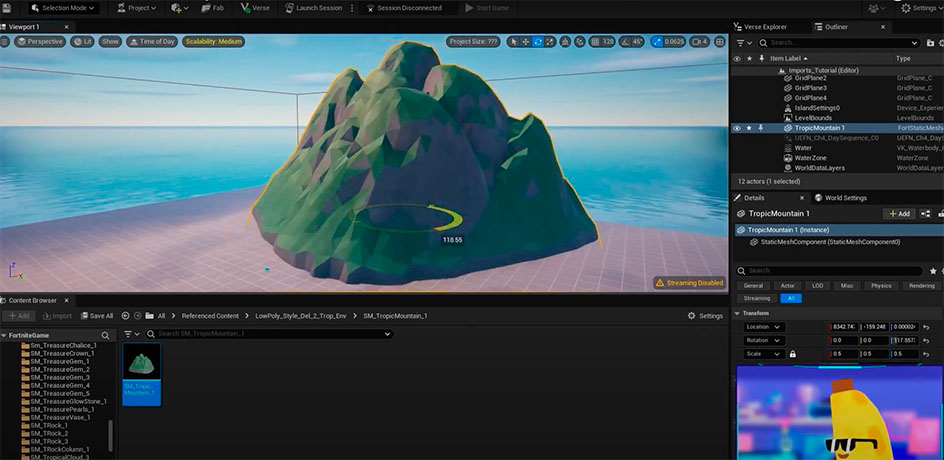
Experimenting with content from Fab
Drag the object you like into the scene. Opening the Details panel, located at the bottom right, we will find the customisation possibilities of the assets. We can change parameters such as scale, location, rotation, the static mesh and even the materials. There are many more options, but we will focus on the most basic ones!
Here are the shortcuts to position the object to your liking:
- W - Move
- E - Rotate
- R - Scale
Note that the material used interacts with the direction of the asset and can be combined with the Fortnite ones, like the water plane. We can also download assets individually in edit mode, which allows us to configure them and change materials, LODs, and collisions.
First look at the Mesh Editor
Double-click on the object to open the Mesh Editor, for setting it at our like.
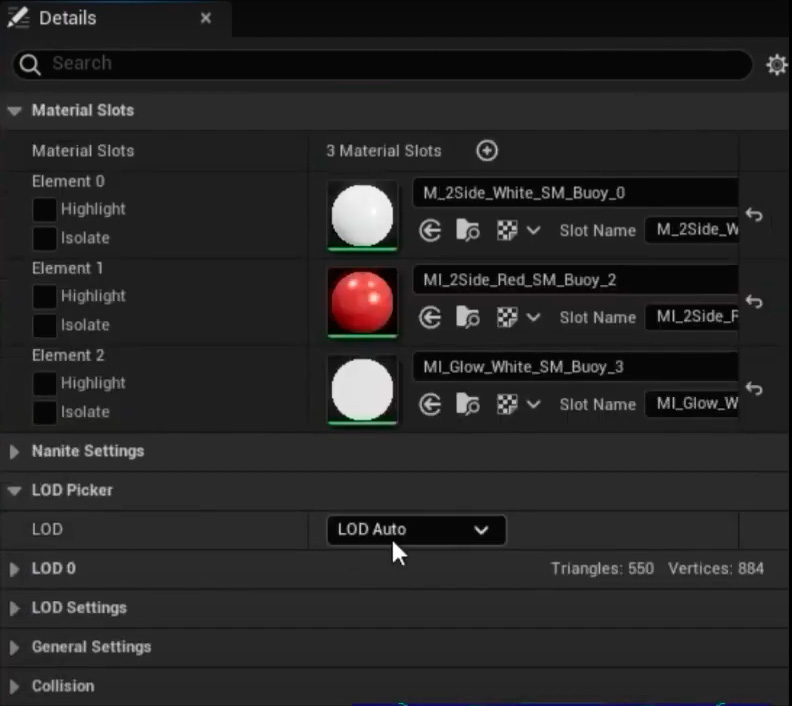
We will see that we have a multitude of options to play with the object's characteristics: it's a matter of trying and getting familiar with all of them to customise our assets exactly as we want!
Getting ready a custom mesh
Here we have one of our models for our hallmark game Tomb Chaser 3 already prepared and imported, using the Import button or by simply dragging the desired folder into our UEFN scene.
Of course, we have a variety of materials created based on trims that we will import into UEFN.
You can download a lot of assets with their materials for free on our Github and Sketchfab profiles. We have made them ourselves, and you can use them free of charge for your 3D projects!
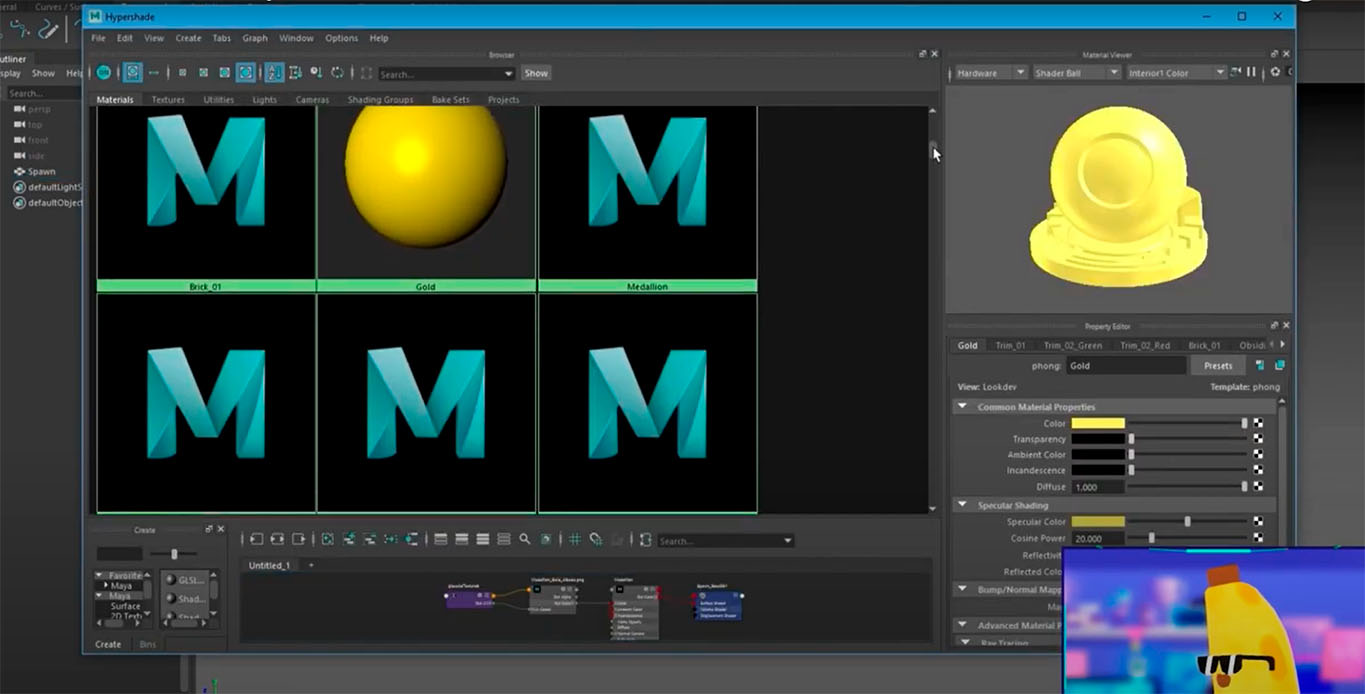
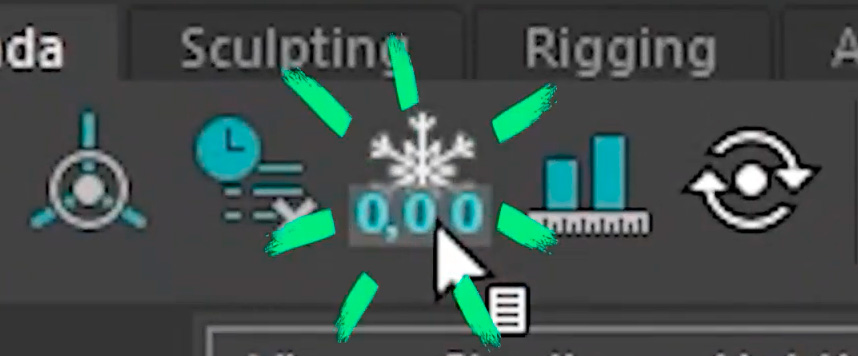
We will make sure that we have the freeze pivot in the centre of the scene and that we have cleared the history of our model! Go to File>ExportSelection having previously selected our mesh and leave the default values of the exporter.
Importing and placing our Custom Mesh
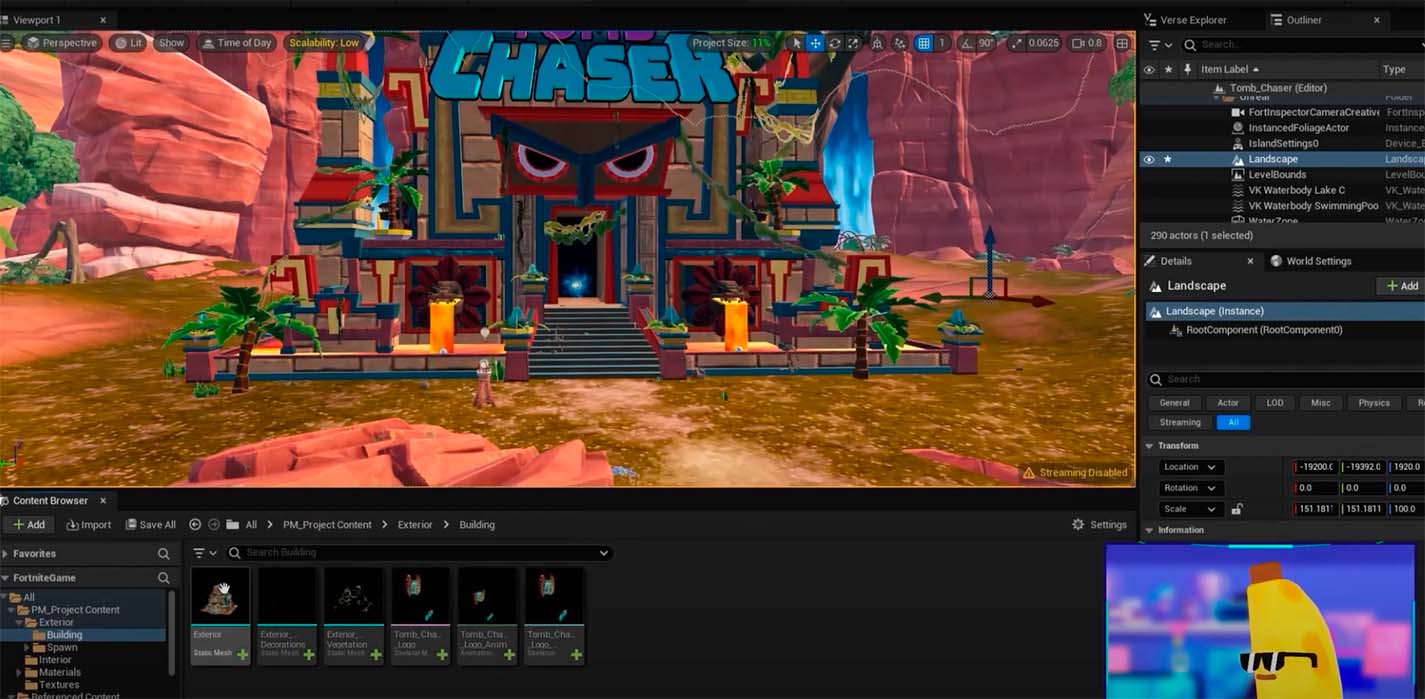
Inside the UEFN we will organize our project as we want, in this case we will divide our models by folders to make it easier to find them.
It’s time to import our new mesh by clicking the Import button and selecting the FBX previously exported.
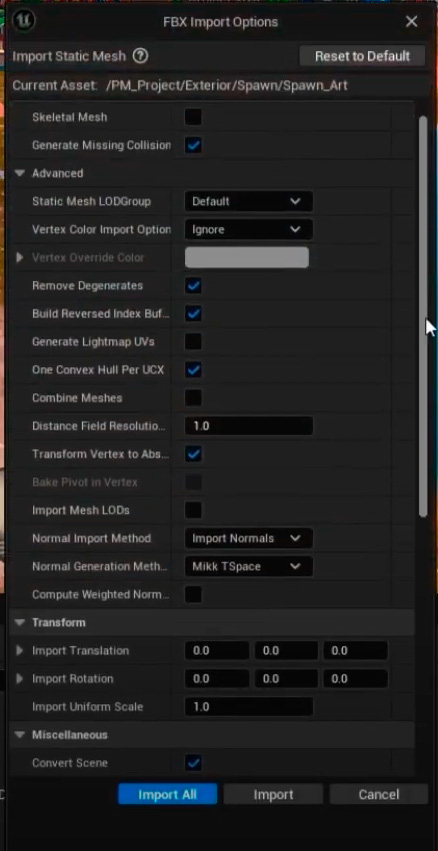
In the FBX Import Options we will be able to edit several among them, the transformation, collision and materials. In this case, what we will do is to import the textures and create new materials to our object so that it comes ready to be placed in the scene.
Now we have all our new materials, texture and mesh in the same folder. To keep it organised, we will create a couple of two more folders where we will place the new materials and textures.
Because we put the pivot in the center of the scene when we place it, it will be placed precisely where we want it to be!
Again, drag the static mesh we want to add to the scene and adjust its location, rotation, scale, etc. parameters so that it blends in perfectly with the environment.
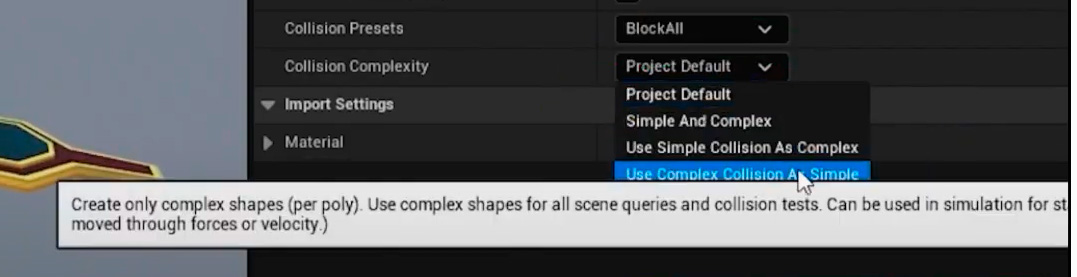
Inside our mesh we will see the materials that we have applied and the collisions that it has.
This last one we will adjust it now with a complex collision, eliminating the previous one and applying a complex as simple so that the collisions have the form of our mesh.
You can download free fab models, as we have done now, to place them in the scene.
Matching aesthetics in our imported mesh
As you can see here we have a much more complete object which we have prepared earlier. This model is separated into several parts as it has many components that we want to act in different ways.
Inside the model we will see that it has a lot of materials starting with MI which stands for Material Instance. These materials we have created before for our project, based on the master materials we created when we started the project.
Since we already have these materials created that fit with the visuals of our scene, let's apply them to our mesh, we now have a style that fits our scene!
Remember that in order to appreciate our scene with better quality, we can change the Scalability of our scene!
Conclusion
That's all, folks! Although it can be a little tedious at first to familiarise yourself with all the options available, working at UEFN is easier than it sounds. It takes practice, yes, but Rome was not conquered in a day.
Thanks to the Fab marketplace and its wide variety of 3D assets we can create amazing scenes and games if 3D modelling is not our thing. Also the opportunity to import our own assets is a plus.
What do you think? Don't go too far, because we will continue making Fortnite and UEFN tutorials to squeeze the most out of the possibilities of this software.


