Automate avatars renders
In this project, we have had to automate many processes to streamline the entire 3D aspect
Premise
In this project, we have had to automate many processes to streamline the entire 3D aspect. We have a total of 100 avatars that need to be rigged with the same skeleton, animated (Idle), posed, and rendered.
Mission
Our mission is to automate everything as much as possible. To achieve this, we need to rig our avatars to the same Armature. This shared armature will then be used to pose the different avatars, allowing us to render them all with the click of a button.
Resources
- Blender 3.6 or above
- Multi-Render Blender Addon
- Rokoko Blender Addon
- Photoshop
Development
In this documentation, our focus will be on automating the rendering of 100 avatars in different poses. To accomplish this, we first need to install two addons that will make our workflow more efficient.
Step 1
We will verify that all avatars are rigged to the same Armature.
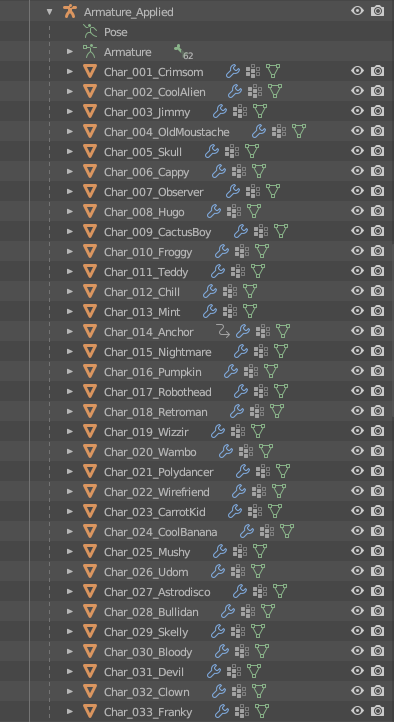
If they are not, we'll proceed to select all the avatars and parent them using the shortcut Ctrl+P.
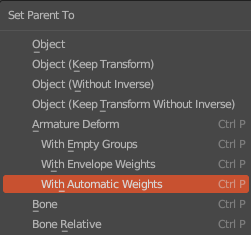
Depending on whether our avatars are already weighted or not, we'll choose the option “with automatic weights” (if not weighted) to assign an approximation.
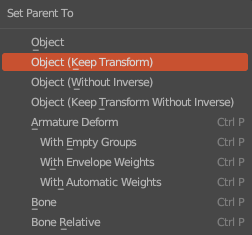
If they’re already weighted, we'll parent them using the “object” (keep transform).
Once all avatars are properly weighted and parented to the armature, we'll create a collection (render) where we'll include the armature and all avatars parented to it.

Step 2
Now, we'll pose the avatars from the parented armature.
Note: If we desire various poses in the renders to avoid uniformity, we can create multiple armatures and then divide the collection based on how many posed armatures we have.

Step 3
Once we have them distributed as desired, we'll configure the scene for rendering. In this case, since we want cartoon-style renders with minimal detail, we'll use Eevee.
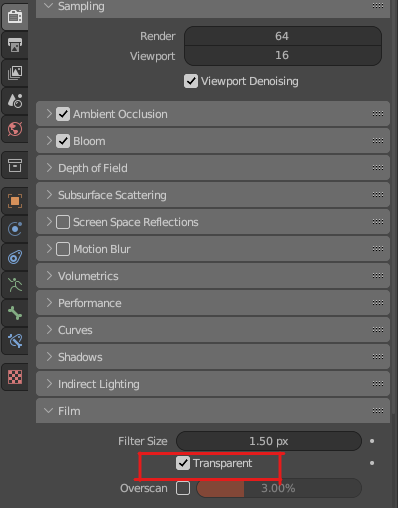
For this case, as we need renders with transparency, we'll export the renders as PNG (assigned by default). We'll ensure to check the Ambient Occlusion and Bloom boxes. Additionally, we’ll expand the Film tab, and mark the Transparent box.
In the Output settings, we'll change the image format to our desired dimensions (in this case, 1024x1024). It's recommended to use powers of two (64, 128, 256, 512, 1024, 2048, etc.).
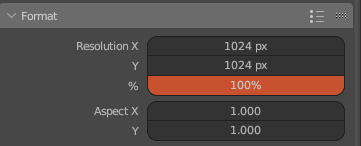
Now, we'll position the camera as needed. In this case, we require renders from the front and full-body. To accommodate the variety of avatars, we'll leave a margin on all edges of the image, considering that some avatars may vary in height.
We'll add one or more lights based on the desired illumination. Here, creativity can be unleashed, as good lighting has the potential to completely transform a render.
Our scene should be fairly clean, something like this:
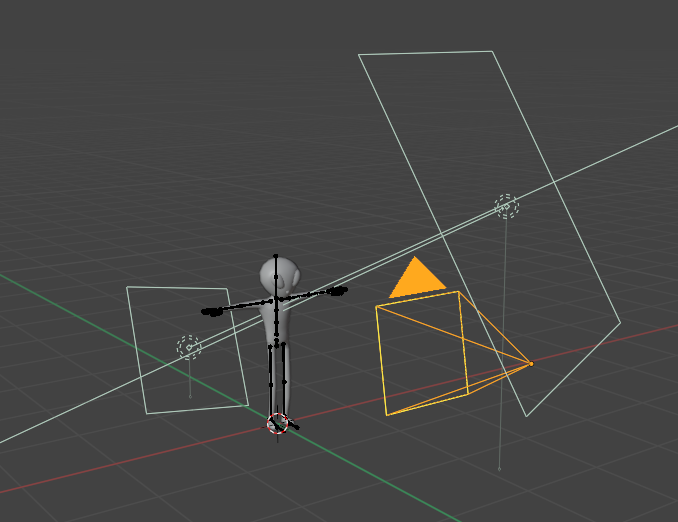
We have two Area Lights, one positioned in the front and another placed as a backlight to mitigate harsh shadows. Additionally, we have a camera configured for rendering.
Step 4
Once everything is set up, we'll need to rename all avatars we want to render. This implies that if we forget to rename a batch of avatars, those won't be included in the rendering process.
For this task, we'll use Batch Rename (Ctrl+F2).
We aim to give them a simple name, so we'll choose the prefix "Char_".
(Be cautious to select all avatars you want to rename).
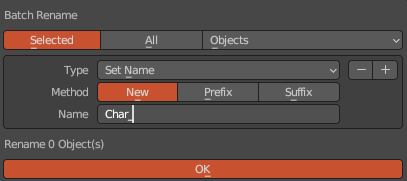
We'll observe that it renames all selected avatars, but we don't want dots in our names. Therefore, we'll use batch rename again, this time employing Find/Replace to remove the dots.

Following this process, we'll have a clean hierarchy, ready for rendering.
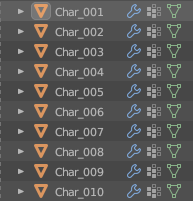
In the viewer, we can expand the tab that says “MBL Utils”.
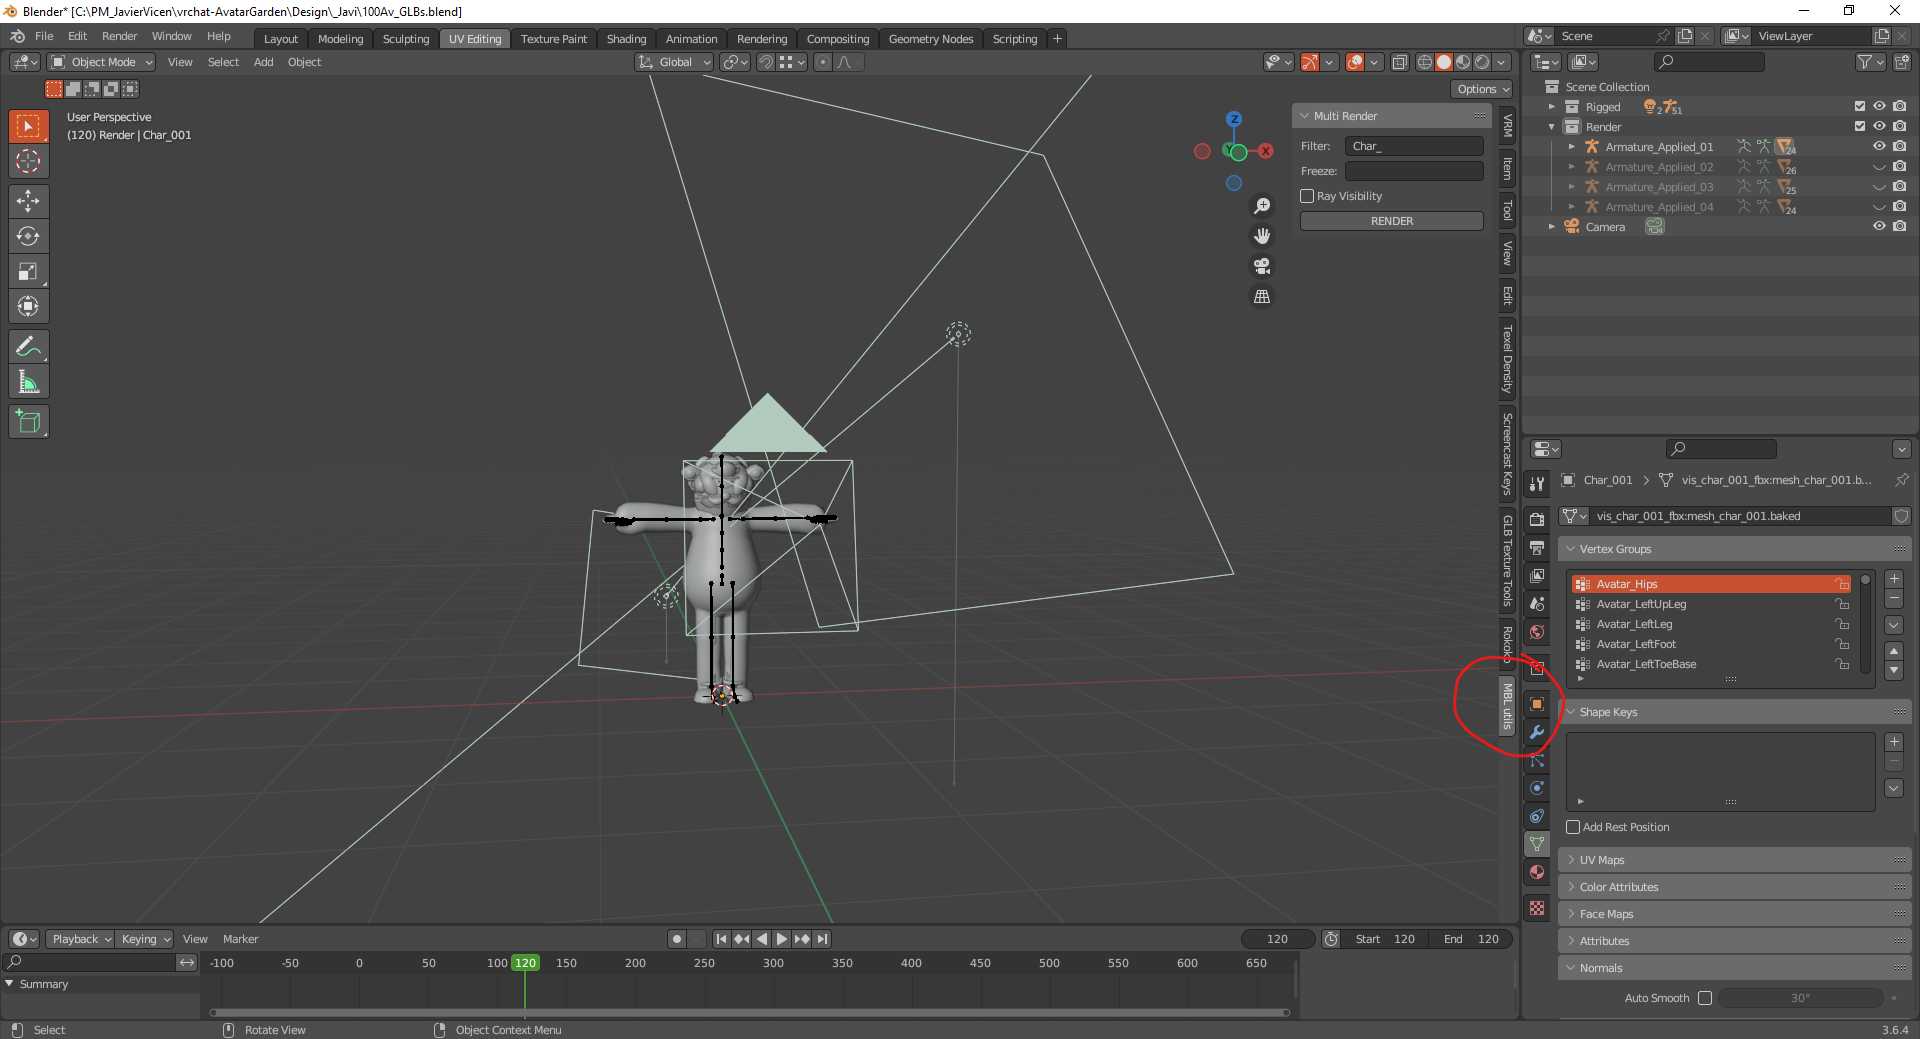
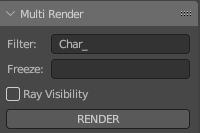
Here, we can see two sections; our focus is on the “Filter”. In this case, where we'll enter the prefix with which we've renamed the characters (Char_).
This will render each avatar one by one that has the prefix Char_ in the name. Now, all that's left is to click the Render button, and we'll have the renders ready.
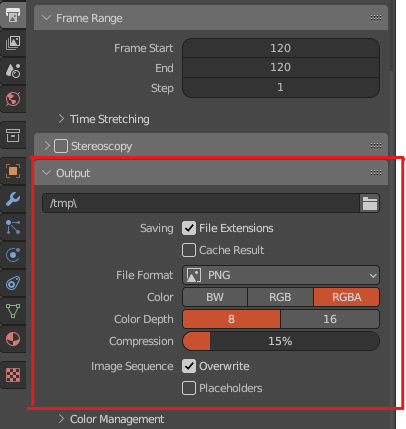
Note: We can change the folder where it exports the renders to any desired location from the output tab:
Conclusion
The project centers around automating processes related to the creation of renders for 100 avatars in Blender.


